Adding Polygon to MetaMask
Those who love Play-To-Earn (P2E) games and metaverse are familiar with the MetaMask application. If you’re new to the field, here’s how to download and then use Metamask. The application is essential for interacting with decentralized apps known as “dApps.”
By default, MetaMask is connected to the Ethereum blockchain. However, other popular dApps also run on the Polygon blockchain, but not everyone knows that you can send/receive cryptocurrencies on the Polygon network via MetaMask. It can interact with various Polygon dApps, but what you need is a MetaMask wallet for this blockchain.
Below, we cover the steps to add Polygon to MetaMask. Once the MetaMask plugin is installed on your Google Chrome browser, you can connect a network to your MetaMask portfolio via Polygon. Here’s how to add Polygon to MetaMask:
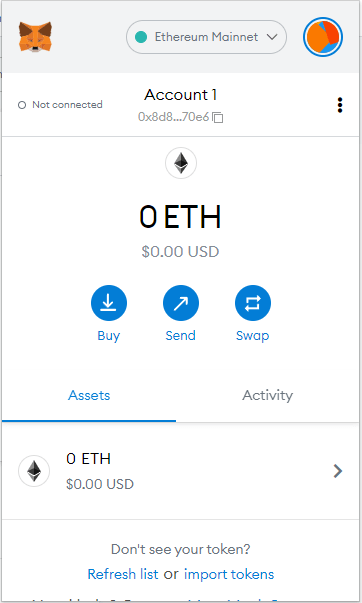
Click On “Ethereum Mainnet”
After clicking the MetaMask icon in your Google Chrome plugin, you should see the screen below. Click on Ethereum Mainnet there at the very top.

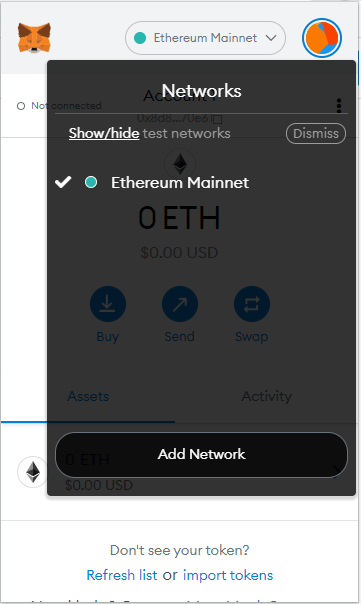
Click “Add Network”

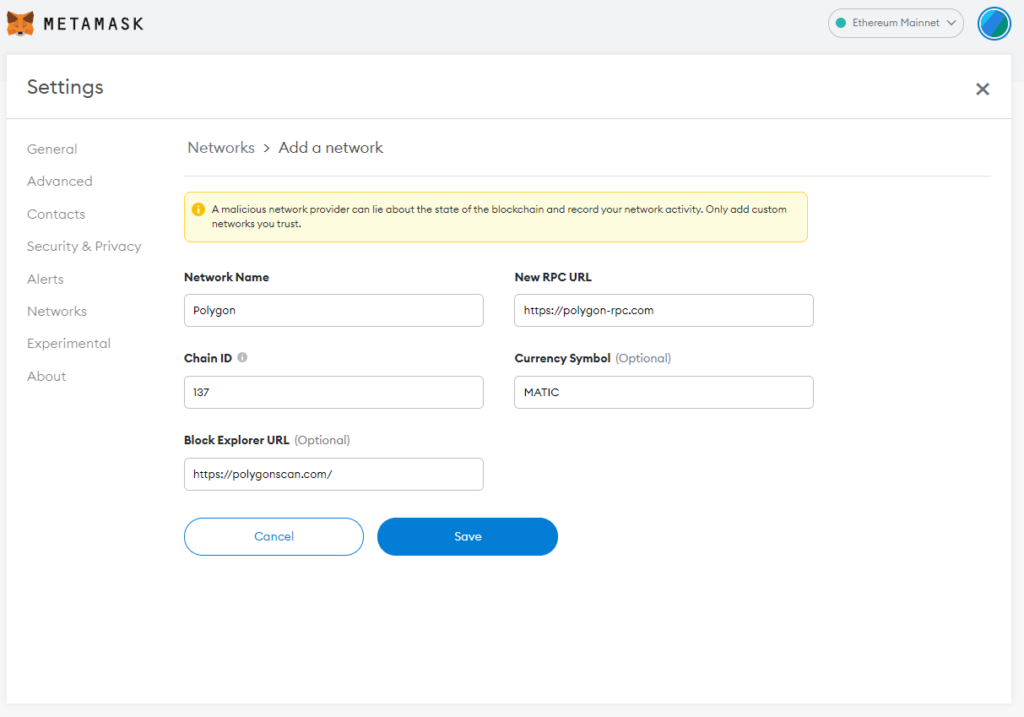
Complete the Following Fields and Click “Save”
Network Name: Polygon
New RPC URL: Here are the nodes you can connect to:
- https://polygon-rpc.com
- https://rpc-mainnet.matic.network
- https://rpc-mainnet.maticvigil.com
- https://rpc-mainnet.matic.quiknode.pro
ChainID: 137
Symbol: MATIC
Block Explorer URL: https://polygonscan.com/

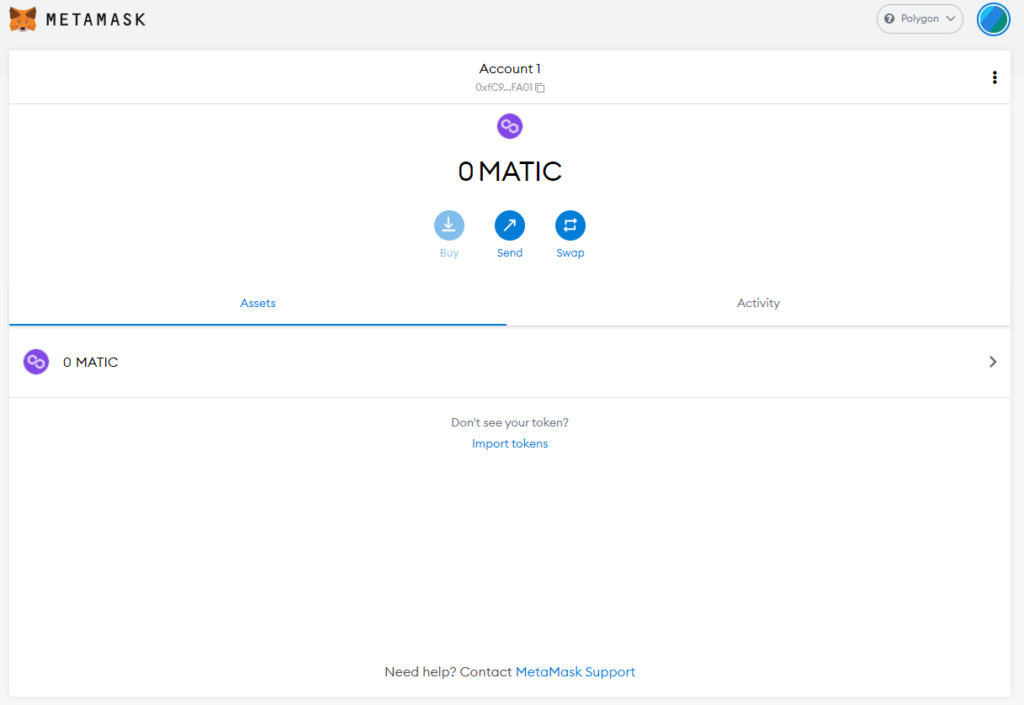
You Can Now Switch Between Networks
Now that you know how to add the Polygon network to MetaMask, you’ll notice, at the top right of your screen, if you’re connected to the Polygon blockchain.
By clicking on “Polygon,” you’ll quickly switch from one blockchain to another. However, to send crypto from one blockchain to another, you must do so indirectly. You can do so by using the Polygon bridge to MetaMask made available by the games and metaverses you use.

In order to exchange your crypto on the Polygon blockchain, you’ll need to use applications such as QuickSwap, which we will detail in a future article.


